Follow the steps in this article to square the X and Y axes of an Ultimaker 3d printer. If you're not sure if you need to square the axes see How do I check for play on the axles? [LINK]
Squaring X/Y Axes
Estimated Time: 1-3 Hours Difficulty: Moderate to Difficult
Tools Needed
- 2.0mm allen Wrench
- 3D Printed Calibration Tool pre-sliced file available for Ultimaker 2/2+/2 Extended attached at end of this article, download the file from here and slice it in CURA [LINK] (Print 2!)
1) Preparation
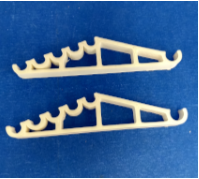
- To square your axes, you will need 2 copies of a special 3D printed tool. It is recommended to print these in advance and store them in your toolbox for when you need them.
- The model is available on Thingiverse at http://thingiverse.com/thing:2729287 or a pre-sliced model is attached to this KnowledgeBase article.
- If using the attached gcode files, use UM2 for Ultimaker 2, 2+, & 2 Extended; use UM3 for Ultimaker 3 & 3 Extended.
- Turn the machine off and remove the power plug
|
 |
2) Squaring the Axes
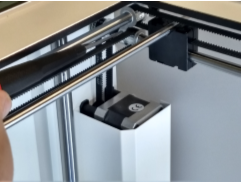
- Loosen the grub screws in all nine of the X/Y Axes pulleys.
- Move the print head to the rear center of the printer
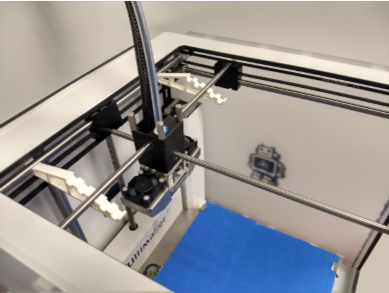
- Attach the two calibration tools to the rear Y axle on either side of the printhead.
- Move the printhead forward until the two grub screws on the rear Y axle are in an accessible position.
- Clip the other end of the calibration tools to the printhead shaft Note - Make sure that the printhead shaft is connected on the same slot on each calibration tool (i.e. the printhead shaft is on the 3rd on both tools, or the 2nd on both tools or so forth.)
- Make sure the axle is through the center of the bearing in the frame.
- Press the rear pulley against the frame and tighten the grub screw.
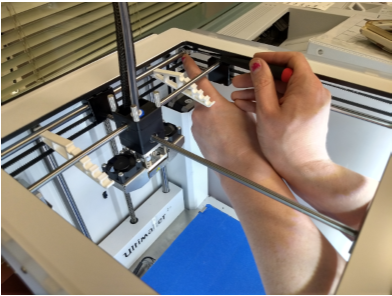
- Repeat with the front pulley.
- Unclip the calibration tool from the print shaft.
- Check for play in that axle.
- If it moves around at all, untighten the grub screws and repeat steps 2-9 on this axle, making sure to keep the pulley tight against the frame while tightening the grub screws.
- When there is no play, unclip the calibration tools from the printhead shaft
- Move the printhead forward a bit and then back again. Make sure the print shaft still clips easily into the same notches.
- Move the printhead to the front center.
- Repeat steps 3-9 for the front Y axle, and then with the left and right X axles, consistently checking for play on an axle after tightening them.
3.) Clean-up & Testing
- Store calibration tools away in your toolbox.
- Plug the printer back in and turn it on
- Finally, as you have just adjusted the axles, you will also need to check that your buildplate is still aligned with them. Print a buildplate leveling check print. (see attachment below, UM2 for Ultimaker 2, 2+, 2E; UM3 for Ultimaker 3/ 3 Extended)
|
| |

Comments
0 comments
Please sign in to leave a comment.