
This article is about printing on a 3D printer. You will need to reserve time on a printer in order to use one. If you have not reserved time on a printer you may be interested in reading How do I Schedule or Reserve Printer Time [LINK]
Printing
1) First you will need to locate the printer you have reserved time on. Each printer will be labeled, so refer to your reservation email to assist you in selecting the correct one.
2) Next you will need to unload any filament currently loaded into the printer. Unloading filament is easy, so if you're using an Ultimaker 2, Ultimaker 2+, or Ultimaker 2 Extended read and follow the article here Ultimaker 2/2+/2 Extended Unloading Filament [LINK]. If you're using an Ultimaker 3 Extended, follow the article here Ultimaker 3 Extended Unloading Filament [LINK]
3) After you unload the filament you can select the filament you want to use from the Filament Dry Storage boxes. Make sure to put the lid back on the container and seal the box so that the filament inside will stay dry for everyone. Then follow the illustration here for Ultimaker 2, Ultimaker 2+, or Ultimaker 2 Extended [LINK] or the illustration here for Ultimaker 3 Extended [LINK]
4) Unload the SD Card (Ultimaker 2) or USB drive (Ultimaker 3) and load it into the Slicing Workstation. Copy your gcode file you made in Cura onto the USB drive or SD Card.
| Ultimaker 2, 2+, & 2 Extended | Ultimaker 3 & 3 Extended | |
 |
 |
|
|
Load the SD Card into the printer. |
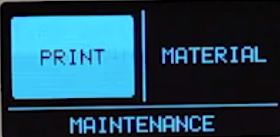
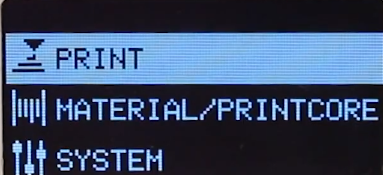
Load the USB drive into the printer. Select PRINT. |
|
 |
 |
|
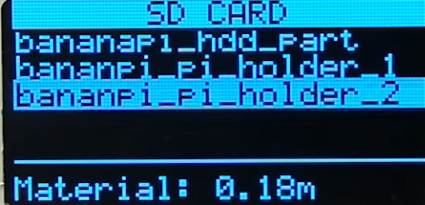
| Select your file (it should be the first in the list) |
Select your file (it should be the first in the list) |
5) The printer will start warming up to get ready to print. It will take a few minutes to finish heating. Make sure to stick around and watch your print closely for the entire 1st layer of the print. The filament should adhere evenly to the bed and not lift off. You will gain more confidence in this as you print more. If the 1st layer of your print fails, the entire print will fail, so you will save yourself time by making sure your print is off to a good start before leaving!
6) The Makerspace will send you an email to let you know when your print is ready to pickup!
Comments
0 comments
Please sign in to leave a comment.